

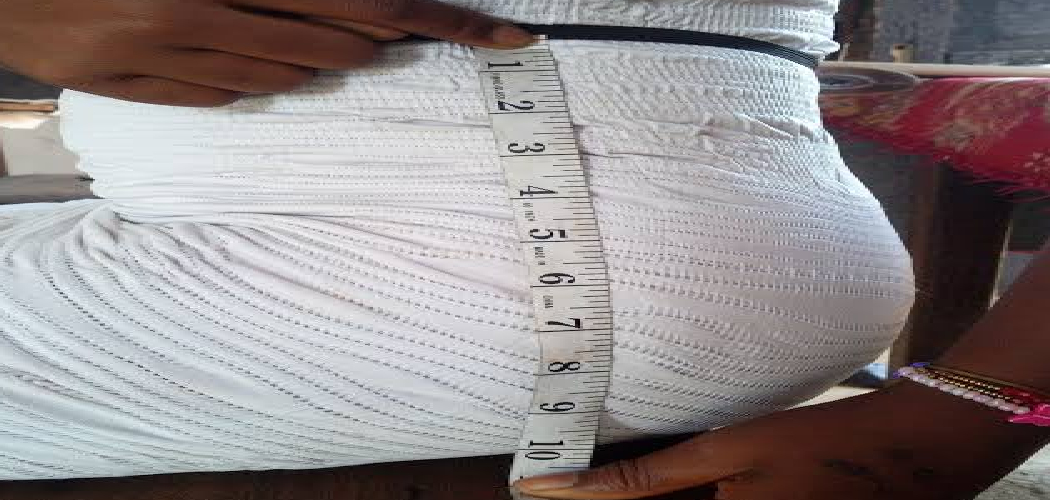
If you’ve ever slipped into a pair of trousers only to find them pinching in all the wrong places or sagging where they shouldn’t, chances are the crotch depth was off. It’s one of the most overlooked measurements in sewing and pattern-making, yet it makes a huge difference in how a garment feels and looks.
So what exactly is crotch depth? In simple terms, it’s the vertical distance from your natural waistline down to the base of your seated body. Picture yourself sitting on a firm, flat chair. The distance from your waist to the seat is your crotch depth. This single measurement decides where the crotch seam of your pants will sit, and it directly affects comfort, movement, and overall fit.
In this guide on how to measure crotch depth, we’ll walk you through everything you need to know. By the end, you’ll be able to take this measurement with confidence every single time.
Benefits of Measuring Crotch Depth
Taking the time to measure crotch depth properly pays off in more ways than you might expect. Here are the key benefits.
- A truly comfortable fit. When the crotch seam sits at the right height, you can sit, bend, and walk without any pulling or bunching. Comfort is the number one reason people learn this measurement, and it’s a game changer.
- Better-looking garments. Pants with the correct crotch depth drape smoothly. There are no strange folds, no drooping fabric, and no unflattering wrinkles around the hips and thighs. Your finished piece simply looks more polished.
- Fewer wasted materials. Measuring before you cut means fewer mistakes. You save fabric, time, and money by getting the dimensions right the first time instead of unpicking seams and starting over.
- Custom fits for every body. Everyone’s proportions are different. Two people with the same waist size can have very different crotch depths. Measuring accurately lets you tailor garments to individual shapes rather than relying on generic sizing.
- Confidence in pattern alterations. Once you know how to measure, you can adjust commercial patterns to suit your body. This opens up a huge range of designs you might have avoided before.
- Consistency across projects. When you record your measurements, you build a personal reference you can use again and again. Every future project starts on solid footing.
What Will You Need?
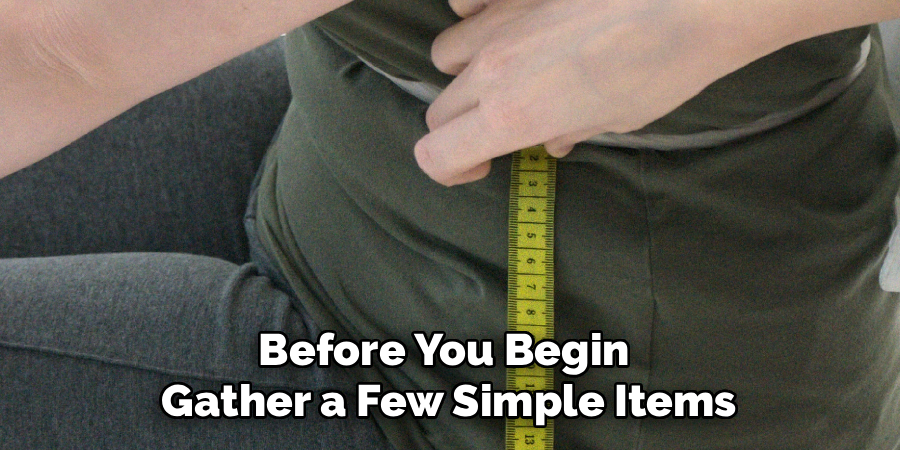
Before you begin, gather a few simple items. None of them are expensive, and you may already have most of them at home.
- A flexible measuring tape
- A firm, flat chair or stool
- A ruler or L-square
- A length of narrow elastic or string
- A pen and notebook
- A friend to help
- Form-fitting clothing
- A mirror
With these ready, you’re set to begin.
10 Easy Steps on How to Measure Crotch Depth
Step 1: Gather Your Materials
Start by collecting everything from the list above and setting it out within easy reach. Place your firm chair on a level floor and keep your measuring tape, elastic, ruler, and notebook nearby. Being organized before you begin saves you from scrambling mid-measurement, which is when errors creep in. If a friend is helping, quickly explain what you’ll be doing so you’re both on the same page. A little preparation now makes the whole process smoother and more accurate.
Step 2: Wear the Right Clothing
Change into thin, close-fitting clothes or simply measure over your underwear. Thick jeans, layered leggings, or bulky sweaters add extra fabric between the tape and your body, which inflates your measurement. Remember, crotch depth is about your actual body, not the clothes on top of it. The closer the tape sits to your skin, the more reliable your number will be. If you plan to wear the finished garment over other layers regularly, you can account for that later during pattern adjustment.
Step 3: Find Your Natural Waist
Your natural waist is the narrowest part of your torso, usually just above your belly button and below your ribcage. To find it, bend gently to one side. The point where your body creases is your natural waistline. This is the starting point for measuring crotch depth, so take a moment to locate it precisely. Many fitting problems begin here, because people confuse the natural waist with the low-rise waist where jeans often sit. Accuracy at this stage sets up everything that follows.
Step 4: Mark Your Waistline
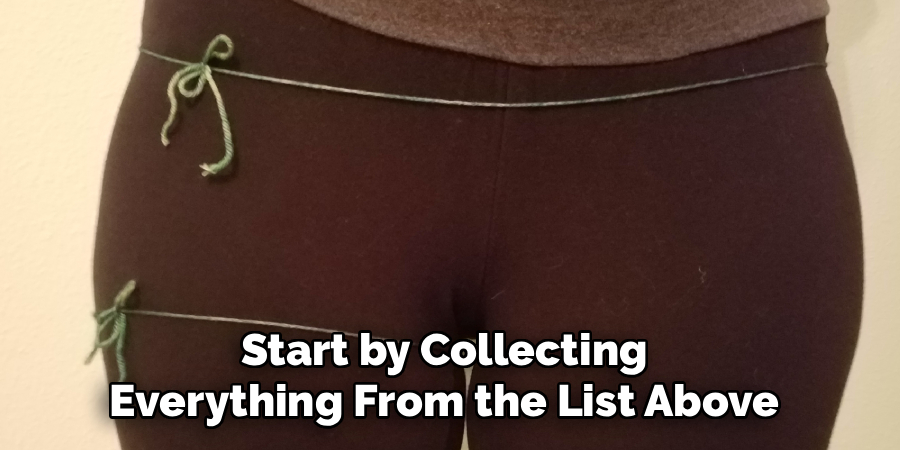
Once you’ve found your natural waist, tie a length of narrow elastic or string snugly around it. Not too tight, just enough to stay in place. This creates a clear, consistent reference line that won’t shift as you move. Check in the mirror or ask your helper to confirm the elastic sits level all the way around, front to back. A crooked waistline marker leads to a crooked measurement, so take the time to get this even. This small step dramatically improves your accuracy.
Step 5: Sit on a Firm Surface
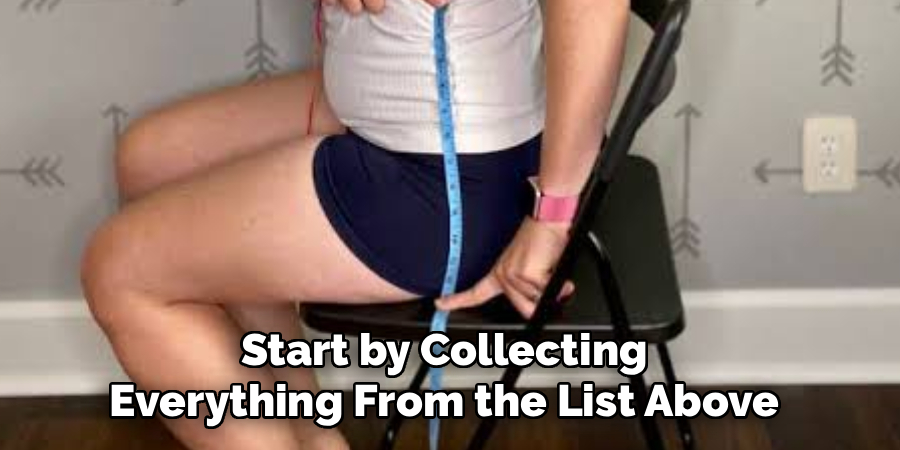
Sit down on your hard, flat chair or stool. Keep your back straight and your feet flat on the floor. Your thighs should be roughly parallel to the ground, with your knees bent at about a ninety-degree angle. Avoid slouching or perching on the edge of the seat, as either will distort the measurement. Sitting properly reflects the natural position your body takes throughout the day, which is exactly what your garment needs to accommodate. Settle in comfortably before you take the reading.
Step 6: Position the Measuring Tape
With your friend’s help, place the end of the measuring tape at your marked waistline on the side of your body. Hold it firmly against the elastic so it doesn’t slip. The tape should run straight down the side of your torso toward the chair seat. Keep it flat against your body without pressing so hard that it digs in. If you’re measuring alone, use a mirror to check the placement, though a helper really does make this step far easier and more precise.
Step 7: Measure Down to the Seat
Now run the tape straight down until it reaches the surface of the chair you’re sitting on. This vertical distance, from your waistline marker to the seat, is your crotch depth. Make sure the tape stays perfectly vertical and doesn’t angle inward or outward. It should follow the natural line of your side. Read the number where the tape meets the chair surface. This is the core measurement of the entire process, so double-check that the tape hasn’t bunched or twisted along the way.
Step 8: Record the Measurement
Write your number down immediately in your notebook. Don’t rely on memory, especially if you’re taking several measurements in one session. Note whether you measured in inches or centimeters and add the date. Keeping a clear record means you can refer back to it for future projects without re-measuring. If you measure for multiple people, label each entry with a name. Good record-keeping turns a one-time effort into a lasting resource you’ll appreciate later.
Step 9: Take a Second Reading
Accuracy loves repetition. Stand up, reset your posture, and measure again from start to finish. Compare the two numbers. If they match, you can trust your result. If they differ by more than a small margin, take a third reading and use the most consistent figure. Bodies shift slightly, tapes slip, and posture changes, so a second measurement catches small errors before they become fitting problems. This quick check is well worth the extra minute it takes.
Step 10: Add Ease if Needed
Your raw crotch depth measurement reflects your body at rest. For most garments, you’ll want to add a little ease so the fabric doesn’t feel tight when you sit or move. The amount of ease depends on the style and the fabric. Fitted trousers need less, while relaxed or woven styles need more. Check your pattern instructions for guidance, and add the recommended amount to your measurement. This final step bridges the gap between raw numbers and a garment that actually feels good to wear.
5 Things You Should Avoid
- Measuring over bulky clothing. Thick fabric adds length you don’t actually have, giving you a false reading. Always measure over thin, close-fitting clothes or underwear.
- Sitting on a soft surface. A cushioned chair or sofa lets your body sink in, which distorts the distance from waist to seat. Stick to a firm, flat surface every time.
- Rushing the process. Hurrying leads to slipped tapes, crooked lines, and misread numbers. Take your time with each step, and you’ll get far better results.
- Guessing your natural waist. Placing the tape too high or too low throws off the entire measurement. Find your true natural waist first and mark it clearly.
- Skipping the second reading. Relying on a single measurement invites error. One quick repeat check confirms your accuracy and saves you from costly fitting mistakes down the line.
Conclusion
How to measure crotch depth might seem like a small detail, but it’s one of the biggest secrets to garments that fit beautifully and feel comfortable all day long. With just a measuring tape, a firm chair, and a few minutes of your time, you can capture a number that transforms the way your trousers sit on your body.
We’ve covered the benefits of getting this measurement right, the simple tools you’ll need, and ten clear steps to follow from start to finish. You now know how to find your natural waist, position the tape correctly, and add the right amount of ease for real-world comfort. You also know which common mistakes to sidestep so your results stay accurate.
So grab your tape, find a firm seat, and give it a try. Your next sewing project, and your future self, will thank you for it. Happy measuring, and happy sewing.

About
Bennie Wilder is a dedicated figure in the world of sewing, clothing repair, and garment care, with years of hands-on experience exploring practical techniques for making, repairing, and maintaining everyday clothing. His professional focus lies in combining traditional sewing craftsmanship with modern, easy-to-follow solutions, helping readers confidently handle common clothing problems at home. As an author at SewFixes, Bennie shares practical knowledge on sewing techniques, garment alterations, fabric care, clothing repairs, and DIY projects for beginners and experienced sewing enthusiasts alike.
Education
Fashion Institute of Technology (New York, USA)
Associate Degree in Fashion Design & Apparel Studies
- Focused on garment construction, sewing techniques, fabric fundamentals, and clothing alterations.
- Developed practical skills in pattern making, hand stitching, machine sewing, and garment finishing.
- Gained hands-on experience working with different fabrics, sewing tools, and apparel construction methods.
Academy of Art University (San Francisco, USA)
Bachelor’s in Fashion Design
- Specialized in apparel construction, textile selection, garment fitting, and contemporary clothing design.
- Studied the relationship between fabric properties, garment structure, durability, and comfort.
- Participated in practical design projects involving garment creation, alterations, repairs, and sustainable clothing practices.
Publications and Impact
Through SewFixes, Bennie shares practical insights into sewing, clothing repair, fabric care, garment alterations, and everyday DIY solutions. His writing focuses on turning complicated sewing tasks into simple, understandable steps that readers can follow at home.
Bennie covers everything from repairing torn seams and replacing buttons to fixing hems, adjusting garment fit, choosing suitable fabrics, and maintaining sewing machines and tools. His content is designed to help readers become more confident with their clothing while encouraging practical repair and reuse instead of unnecessary replacement.
Through his work, Bennie aims to bridge the gap between traditional sewing knowledge and modern everyday needs—making sewing more approachable, useful, and accessible to anyone who wants to repair better, sew smarter, and make their clothes last longer.