

Sewing needles are small, but they play a huge role in every project you tackle. Whether you sew by hand or love your machine, these tiny tools deserve better than being tossed into a drawer or left stuck in a pincushion for years. When you store your needles properly, they stay sharp, rust-free, and ready to use the moment inspiration strikes.
Poor storage causes more problems than most people realize. Needles bend, dull, rust, and disappear when they aren’t kept in order. Worse still, loose needles can be a real safety hazard, especially in homes with children or pets. A stray needle on the floor or buried in fabric is an accident waiting to happen.
In this guide on how to store sewing needles, we’ll walk through the benefits, the tools you need, ten easy steps to follow, common mistakes to avoid, and answers to a few questions sewists ask most. Let’s dive in and give your needles the home they deserve.
What Are the Benefits?
Taking the time to store your sewing needles properly pays off in more ways than one. Here are the key benefits you’ll enjoy once you build a solid storage habit.
- Longer needle life. Needles that are kept dry and protected stay sharp far longer. You won’t need to replace them nearly as often, which saves you money over time.
- Rust prevention. Moisture is the enemy of metal. Proper storage keeps humidity away from your needles, stopping rust before it starts. Rusty needles snag fabric and can ruin a project.
- Better organization. When every needle has a place, you can find the right one in seconds. No more digging through drawers or squinting at a pincushion trying to spot the size you need.
- Improved safety. Loose needles are dangerous. Storing them securely keeps sharp points away from curious kids, pets, and your own fingertips.
- Easy size identification. Good storage lets you sort needles by type and size. You’ll always know which needle suits your fabric, from delicate silk to heavy denim.
- Less waste. When you can see what you own, you stop buying duplicates. You use what you have, and nothing goes to waste in a forgotten corner.
- A more enjoyable sewing experience. A tidy, well-stocked needle collection makes sewing more relaxing. You spend your time creating instead of searching.
What Will You Need?
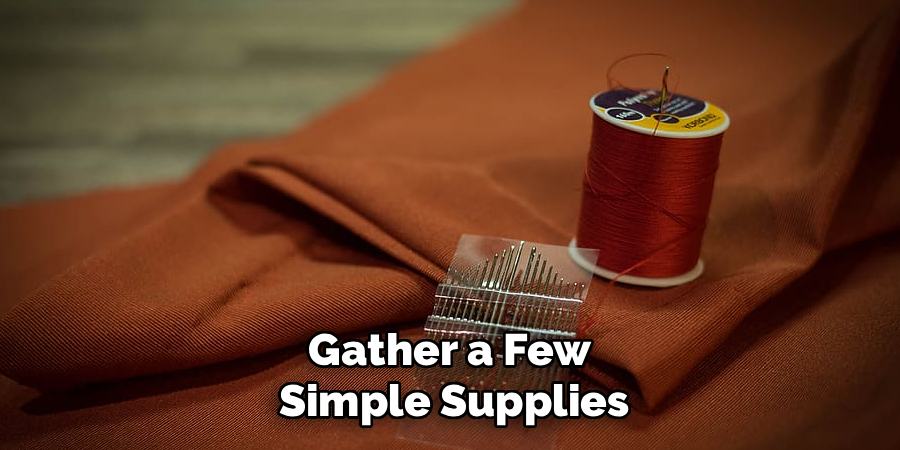
Before you get started, gather a few simple supplies. Most of these items are cheap and easy to find, and you may already have some at home.
- A needle case or needle book – A dedicated container or fabric booklet to hold your needles.
- A magnetic needle holder – Handy for keeping loose needles from rolling away.
- A pincushion – For needles you use frequently during a project.
- Small labels or stickers – To mark sizes and types.
- A permanent marker or pen – For writing clear labels.
- Felt or wool fabric – Wool naturally helps prevent rust and keeps needles sharp.
- Anti-rust strips or silica gel packets – To absorb moisture in your storage container.
- A small airtight box or tin – For long-term storage.
- Original needle packets – Keep these to store needles by their original size markings.
- A dedicated drawer or storage bin – To keep everything in one central spot.
With these tools ready, you’re set to organize your needles like a pro.
10 Easy Steps on How to Store Sewing Needles
Step 1: Gather and Sort All Your Needles
Start by collecting every needle you own. Check drawers, pincushions, project bags, and any spot where stray needles tend to hide. Once you have them all in one place, sort them into groups. Separate hand-sewing needles from machine needles, and then divide each group by type and size. This first step gives you a clear picture of your collection and helps you spot needles that are bent, dull, or rusty. Set those damaged ones aside for disposal. Sorting may take a few minutes, but it makes every step that follows much easier.
Step 2: Inspect Each Needle for Damage
Before storing anything, take a close look at each needle. Run your fingers gently along the shaft to feel for bends, and check the point for dullness. Hold each needle up to the light to spot rust spots or discoloration. A bent or blunt needle will only cause frustration later, so it’s better to remove it now. Damaged needles can snag threads, skip stitches, and even damage your fabric. Being picky at this stage means every needle you store will be one you can trust when you sit down to sew.
Step 3: Choose the Right Storage Container
Pick a storage solution that fits your needs and the size of your collection. A needle book works beautifully for hand needles, while a small tin or labeled case suits machine needles. If you sew often, a container with dividers helps keep sizes separate. Think about where you’ll keep it too. A compact case is easy to tuck into a sewing box, while a larger organizer might live in a drawer. The right container protects your needles and keeps them within easy reach whenever you need them.

Step 4: Line Your Container With Wool or Felt
Wool and felt do more than cushion your needles. Wool contains natural oils, called lanolin, that help keep needles sharp and slow down rust. Cut a piece of wool felt to fit your needle book or case, then layer it inside. When you push needles into the felt, they stay put and stay protected. This simple trick has been used by sewists for generations, and it works. If you don’t have wool, standard felt still offers cushioning and keeps needles from rattling around loosely.
Step 5: Separate Needles by Type and Size
Now put your sorting work to good use. Place each type of needle in its own section, pocket, or page. Keep sharps with sharps, ballpoints with ballpoints, and so on. Within each type, arrange needles by size, from smallest to largest. This system means you’ll never grab the wrong needle by mistake. When you’re mid-project and need a size 80 machine needle, you’ll find it instantly. A little organization here saves a lot of frustration later.
Step 6: Label Everything Clearly
Labels are your best friend when it comes to needle storage. Write the type and size on small stickers or directly on your container. For machine needles, note the number and the fabric they suit, like “90/14 – denim.” Clear labels take the guesswork out of picking a needle. Over time, you’ll rely on these markings to grab exactly what you need without opening every packet. If your eyesight isn’t perfect, use a bold marker and large print so labels are easy to read at a glance.
Step 7: Add a Moisture Absorber
Humidity causes rust, so keep it away from your needles. Drop a silica gel packet or an anti-rust strip into your storage container. These little packets soak up moisture and keep the air inside dry. You can save the silica gel packets that come with shoes, vitamins, and electronics for this exact purpose. Replace them every few months, or when they feel damp. This small step makes a big difference, especially if you live in a humid climate or store your needles in a basement or garage.
Step 8: Keep Frequently Used Needles Handy
You don’t need to dig into deep storage every time you sew. Keep a small pincushion or a separate mini case with the needles you reach for most often. This working set stays close to your machine or in your sewing kit. When a project wraps up, return those needles to their proper home in your main storage. This two-tier system keeps your everyday sewing smooth while protecting the rest of your collection for the long haul.
Step 9: Store Needles in a Cool, Dry Place
Location matters. Choose a spot for your needle storage that stays cool, dry, and out of direct sunlight. Avoid damp areas like bathrooms or unheated garages, where moisture can build up. A drawer, a shelf, or a sewing cabinet in a climate-controlled room works best. Keeping needles away from heat and humidity protects them from rust and warping. A stable environment means your needles stay in top shape between projects, ready whenever you are.
Step 10: Maintain and Review Your Storage Regularly

Storage isn’t a one-time task. Every few months, take a moment to check your collection. Replace moisture absorbers, toss any needles that have dulled or rusted, and restock sizes you’re running low on. Return stray needles to their proper spot. This quick review keeps your system working and your needles ready to use. A little upkeep goes a long way, and it turns needle storage into an effortless habit rather than a chore.
5 Things You Should Avoid
Even with the best intentions, a few common mistakes can undo your hard work. Steer clear of these pitfalls.
- Storing needles in damp areas. Moisture leads to rust fast. Never keep needles in bathrooms, basements, or anywhere humidity is high without a moisture absorber.
- Mixing all needles. Tossing every needle into one container makes it impossible to find the right size. It also increases the chance of bending and dulling as they knock against each other.
- Leaving needles in a pincushion forever. Pincushions are great for active projects, but long-term storage there exposes needles to dust and air. Some pincushion fillings can even encourage rust.
- Ignoring damaged needles. Keeping bent or dull needles “just in case” clutters your storage and risks damaging future projects. Toss them safely and move on.
- Skipping labels. Without labels, you’ll waste time guessing sizes and types. Unlabeled needles often go unused simply because you can’t tell them apart.
Conclusion
How to store sewing needles is one of the simplest ways to improve your entire sewing experience. It costs little, takes only a bit of time to set up, and rewards you with sharp, rust-free needles that are always easy to find. From sorting and inspecting to labeling and maintaining, each step builds a system that keeps your tools safe and your workspace tidy.
Remember the big wins: longer needle life, fewer rusty surprises, better safety at home, and less money spent replacing lost or ruined needles. Avoid the common mistakes, keep moisture at bay, and give your needles a proper home rather than a tangled drawer.
So gather your supplies, follow the steps, and treat your needles with the care they deserve. Your future self, and every project you stitch, will thank you for it.

About
Bennie Wilder is a dedicated figure in the world of sewing, clothing repair, and garment care, with years of hands-on experience exploring practical techniques for making, repairing, and maintaining everyday clothing. His professional focus lies in combining traditional sewing craftsmanship with modern, easy-to-follow solutions, helping readers confidently handle common clothing problems at home. As an author at SewFixes, Bennie shares practical knowledge on sewing techniques, garment alterations, fabric care, clothing repairs, and DIY projects for beginners and experienced sewing enthusiasts alike.
Education
Fashion Institute of Technology (New York, USA)
Associate Degree in Fashion Design & Apparel Studies
- Focused on garment construction, sewing techniques, fabric fundamentals, and clothing alterations.
- Developed practical skills in pattern making, hand stitching, machine sewing, and garment finishing.
- Gained hands-on experience working with different fabrics, sewing tools, and apparel construction methods.
Academy of Art University (San Francisco, USA)
Bachelor’s in Fashion Design
- Specialized in apparel construction, textile selection, garment fitting, and contemporary clothing design.
- Studied the relationship between fabric properties, garment structure, durability, and comfort.
- Participated in practical design projects involving garment creation, alterations, repairs, and sustainable clothing practices.
Publications and Impact
Through SewFixes, Bennie shares practical insights into sewing, clothing repair, fabric care, garment alterations, and everyday DIY solutions. His writing focuses on turning complicated sewing tasks into simple, understandable steps that readers can follow at home.
Bennie covers everything from repairing torn seams and replacing buttons to fixing hems, adjusting garment fit, choosing suitable fabrics, and maintaining sewing machines and tools. His content is designed to help readers become more confident with their clothing while encouraging practical repair and reuse instead of unnecessary replacement.
Through his work, Bennie aims to bridge the gap between traditional sewing knowledge and modern everyday needs—making sewing more approachable, useful, and accessible to anyone who wants to repair better, sew smarter, and make their clothes last longer.