

A loose or missing button can turn a favorite shirt into a forgotten one, tucked away at the back of your closet.
The good news is that fixing it takes just a few minutes and a couple of simple tools you probably already own.
Learning how to sew a button is one of the most useful everyday skills you can pick up, and it saves you money, time, and trips to the tailor.
Whether a button popped off your work shirt this morning or you want to be ready for future wardrobe surprises, this skill puts you back in control.

You do not need any special training to get started. With a needle, some thread, and a little patience, you can make a repair that looks neat and holds strong for years.
This friendly guide breaks the whole process into clear, manageable steps, so nothing feels confusing. We will cover the tools you need, the exact stitching method, and a few handy tips that make the job easier.
Grab your garment and get comfortable, because you are about to learn something genuinely useful.
Why Sewing A Button Matters
Knowing how to reattach a button keeps your clothes in service far longer and cuts down on waste.
Instead of tossing a shirt over one tiny problem, you fix it in minutes and wear it again with confidence.
That small repair adds up to real savings over a year, especially when you skip the cost of professional alterations.
There is also a confidence boost that comes with self-reliance. Once you master this basic stitch, you can tackle jackets, coats, cushions, and more without stress.
It is a skill that works across every wardrobe and every season, no matter your experience level. You gain independence, protect your favorite pieces, and reduce your impact on the environment.
Best of all, each repair gets faster and easier as your hands learn the rhythm of the needle.

Step-By-Step Guide To How To Sew A Button
Step 1: Gather Your Tools And Materials
Before you begin, collect everything you need so you can work without stopping halfway through.
You will want a needle with an eye large enough to thread easily, thread that matches your garment, small sharp scissors, and the button itself.
A thimble helps protect your finger when pushing through thick fabric, though it is optional for lighter materials.
Keep the original button if you still have it, since a perfect match looks best. If not, choose a replacement of the same size and hole count. Lay your tools on a flat, well-lit surface where you can see clearly. Good lighting and a tidy space make the whole job smoother and far less fiddly.
Step 2: Thread The Needle Correctly
Cut a length of thread about the span of your forearm, which gives you enough to work with without tangling.
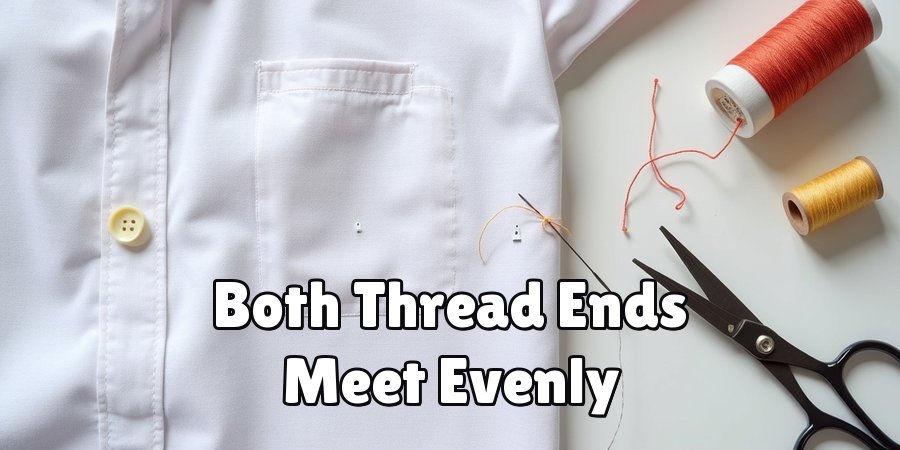
Push one end through the eye of the needle, then pull it until both ends meet evenly.
Tie the two ends together with a small, firm knot so the thread cannot slip out as you stitch.
Using doubled thread like this makes your repair much stronger and speeds up the process. If threading feels tricky, moisten the thread tip and flatten it between your fingers for a cleaner point.
Beginners often find a needle threader helpful here, and these little tools cost very little. Take your time, because a well-threaded needle sets you up for smooth stitching.
Step 3: Learn In The Right Spot
Position matters, so line up the button exactly where the old one sat. Look for the faint marks or leftover threads that show its original home, and match that spot on the fabric.
Hold the button in place with your thumb, or use a small dab of fabric glue to keep it steady while you start.
Push the needle up from the underside of the fabric so the knot hides beneath the garment. Bring it through one hole of the button, then press the button flat against the cloth.
Getting this placement right ensures your shirt closes neatly and lines up with the buttonhole. A moment of care here saves you from redoing the whole repair later.
Step 4: Create The Stitch Pattern
Now you build the stitches that hold the button firmly. Pass the needle down through the hole diagonally across from where you came up, then bring it back up through a neighboring hole. For a four-hole button, aim for a clean X shape or two parallel lines, whichever style you prefer.
Repeat this pattern six to eight times, keeping the thread snug but not so tight that the fabric puckers. Each pass adds strength, so do not rush this part.
Try to keep your stitches even and neat for a professional look. If your button has only two holes, simply stitch straight back and forth through both until the button feels secure and steady.
Step 5: Build A Thread Shank
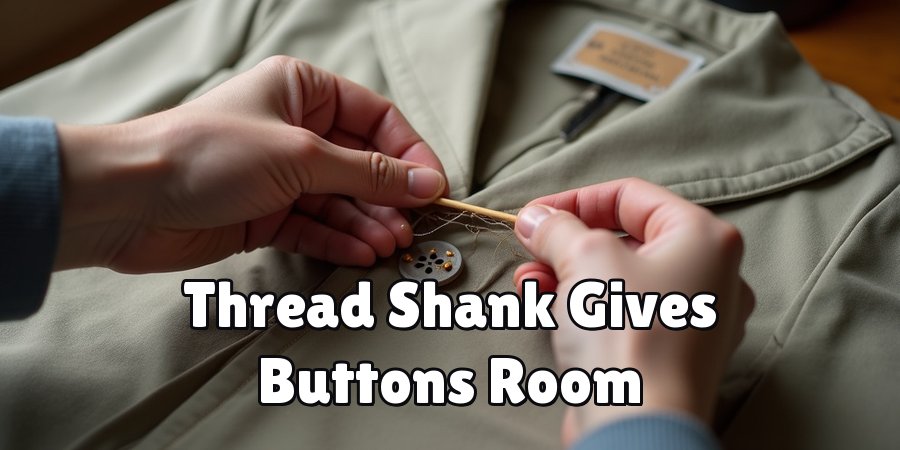
A thread shank is a small stack of thread beneath the button that gives it room to sit above the fabric. This little gap lets the button pass through the buttonhole easily once your garment is thick with layers. To make one, slip a toothpick or matchstick under the button before your final stitches.
After stitching, remove the toothpick, lift the button slightly, and wrap the thread several times around the loose threads underneath. This wrapping tightens everything into a firm, neat column.
The shank is a small detail that makes a big difference in comfort and function. Skip it on very thin fabrics, but for coats and jackets it is well worth the effort.
Step 6: Knowing Securely To Finish
Once your stitches feel strong and the shank is wrapped, it is time to lock everything in place. Push the needle through to the underside of the fabric one final time.
Make a small loop with the thread, then pass the needle through that loop two or three times to form a tight knot close to the cloth.
Pull the knot firmly so it sits flush against the fabric and will not unravel with wear. A secure knot is what keeps your hard work from coming undone in the wash.
Give the button a gentle tug to test its hold. If it feels solid and does not wobble, you have done the job right and your repair will last.
Step 7: Trim And Inspect Your Work
With the knot tied, snip the leftover thread close to the fabric, leaving no loose tails that could catch or fray. Sharp scissors give the cleanest cut, so avoid tearing the thread with your fingers. Turn the garment over and check both sides for any stray loops or messy stitches.
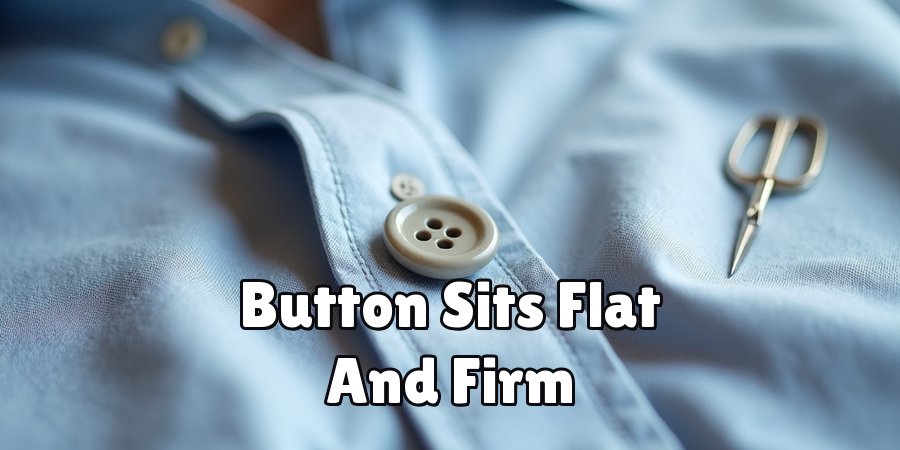
Run your thumb over the button to confirm it sits flat and firm. Try fastening it through the buttonhole to make sure it slides in smoothly and holds.
If everything looks tidy and feels secure, your repair is complete. Take a moment to admire your handiwork, because you just fixed something with your own two hands and saved a favorite piece of clothing.
Frequently Asked Questions
What Type Of Thread Works Best?
For most repairs, a good-quality all-purpose polyester or cotton thread does the job well.
Choose a color that matches your garment for a seamless look, or pick a contrasting shade if you want the button to stand out.
For heavy items like coats, consider a thicker button thread, which offers extra strength. Doubling your thread also adds durability and helps your repair last much longer through regular washing and wear.
How Many Stitches Do I Really Need?
Aim for around six to eight passes through the holes for a standard shirt button. This gives enough strength to withstand daily use without adding bulk.
Heavier buttons on jackets or coats may need a few extra stitches for added security. The goal is a firm hold without puckering the fabric, so keep your tension steady.
If the button feels wobbly, simply add another pass or two before knotting.
Do I Always Need A Thread Shank?
Not always, since it depends on your fabric. A thread shank helps most on thick materials like denim, wool, or coats, where the button needs room to sit above the cloth.
For thin fabrics such as light cotton shirts, you can stitch the button flat against the fabric without a shank.
When in doubt, a small shank rarely hurts and often makes buttoning easier and more comfortable.
What If I Do Not Have A Matching Button?
Check inside your garment first, since many clothes come with a spare button sewn near the hem or care label.
If none exists, take the old button to a craft store to find a close match by size and hole count.
When you cannot match it exactly, consider replacing all the buttons for a uniform look. Mismatched buttons can even become a fun, intentional style choice.
Can Beginners Really Master This Skill?
Absolutely, and it is one of the friendliest sewing skills to start with. The steps are simple, the tools are inexpensive, and mistakes are easy to undo and try again.
With a little practice, most people get comfortable after just one or two repairs. Take your time, follow each step, and do not worry about perfection early on.
Every button you fix builds your confidence for the next one.
Conclusion
Fixing a button is a small task with a big payoff, saving your favorite clothes and giving you a genuine sense of accomplishment.
From gathering your tools and threading the needle to stitching, building a shank, and tying a secure knot, each step brings you closer to a repair that looks neat and holds strong.
Along the way, you gain a practical skill that works across every wardrobe and season, and you cut down on waste while keeping more money in your pocket.
Now that you understand how to sew a button from start to finish, there is nothing stopping you from tackling that pile of loose buttons waiting at home.
Start with one simple repair, take each step at your own pace, and celebrate the win when your button holds firm. The more you practice, the faster and easier it becomes, until this handy skill feels like second nature.
Grab a needle, pick a garment, and give it a try today.

The Sew Fixes team — we mend our own clothes and write down what worked. Every guide here started as a repair on something we were not ready to throw away.